Showing posts with label Kilnformed. Show all posts

Wednesday, February 27, 2013

Soft Peppers And Skull


* I don't think this melt schedule is correct. For all my trying I still have a terrible habit of not writing down on the schedule WHAT it is I was working with. And of course, the reason I do a kiln blog instead of a log is because I lose paper and books all the time.
Kiln 5

1) 03 ↑ 600°
2) 04 @ 600°
3) 4:01 ↑ 875°
4) 07 @ 875°
5) 7:01 ↓ 516°
6) 09 @ 516°
7) 11 ↓ 390°
8) 12 ↓60°

Remelt Schedule, as always.

Kiln 5
1) 09 ↑ 880°
2) 13 @ 880°
3) 13:01 ↓ 516°
4) 17 @ 516°
5) 19 ↓ 390°
6) 20 ↓ 60°


Monday, February 25, 2013

Aperture Pour

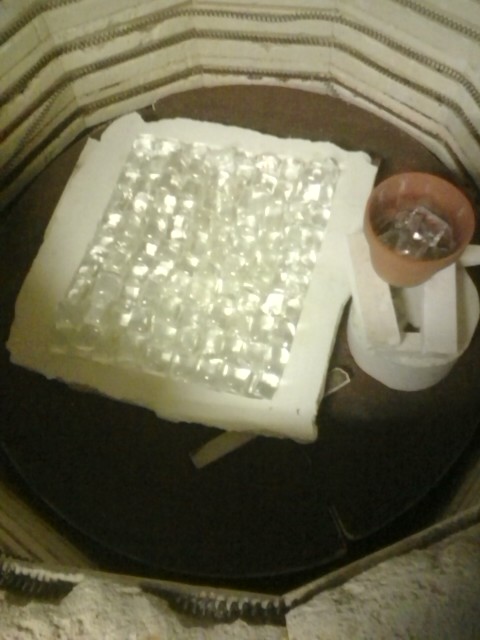
I wanted to make an example of an aperture pour, so I grabbed the mismatched pieces of glass from all the snowflakes I tried to make last semester, including some broken snowflakes as well, and I ran a melt. Unfortunately since the melting temperature of the white is so much higher than the blue, the white actually separated a lot of itself from the blue (even though it was mish-mashed), and sat in the bottom of the flower pot. Weird. But I think the subtle line design is pretty neat.


Fri. Jan 18, 2013
Kiln 2
1) 01 min ↑ 880°
2) 35 min @ 880°
3) 36 min ↓ 516°
4) 1:30 @ 516°
5) 2:00 ↓ 390°
6) 2:30 ↓ 60°

Saturday, February 16, 2013

Nightlights

Taking after all the other fused glass artists out there, I decided to try my hand at making my own nightlights. I also thought they would be a fantastic way to test out my textured designs.

Steamed Out Molds


December 2, 2012 (I do think this date is wrong)
Kiln 4
1) 07 ↑ 120°
2) 08 @ 120°
3) 14 ↑ 600°
4) 15 @ 600°
5) 15:01 ↑ 900°
6) 17:30 @ 900°
7) 17:31 ↓ 516°
8) 24 @ 516°
9) 31 ↓ 390°
10) 32 ↓ 50°

Friday, December 21, 2012

Neat Things Happen at 600°!

I enthusiastically molded three large sheets of wax that I wanted to use as experiments for my whole new, lighting and texture direction. Unfortunately I was a little bit too enthusiastic and didn't think I needed a wall when hand building the molds, and so they of course took forever and turned out horrible. I tried casting one of the sheets, along with a clear, soft glass pepper, but the mold broke.

But wait! This is a good thing, because I got to see the weird step that occurs around 600 degrees, which is when chemical water leaves the mold.

Amazing texture!

A doomed mold that took a very, very long time to lay out.

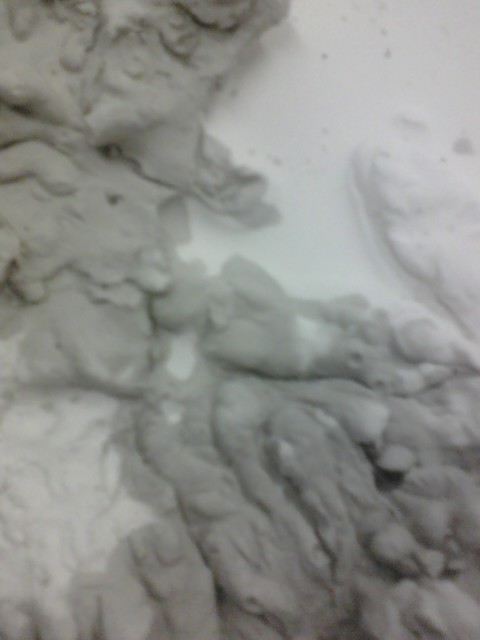
The amazingly weird gray color that was all over my mold in patches.


Nov, 30, 2012
Kiln 4
1) 09 ↑ 120°
2) 10 @ 120°
3) 20 ↑ 600°
4) 21:30 @ 600°
5) 21:31 ↑ 900°
6) 26 @ 900°
7) 26:01 ↓ 516°
8) 33 @ 516°
9) 47 ↓ 390°
10) 48 ↓ 60°

Tuesday, December 4, 2012

Two More Crystal Peppers

These two peppers were cast in Cobalt Blue and Pale Lagoon. They did not have pepper cores because I wanted the focus to be on the outside texture. I decided to do this because when I examined the texture on the waxes I realized that the surface was filled with tiny, vertical ridges.


November 23, 2012
Kiln 5

1) 12 hr ↑ 120º
2) 23 hr ↑ 600º
3) 24 hr @ 600º
4) 24:01 ↑ 843º
5) 29 hr @ 843º
6) 29:01 ↓ 440º
7) 37 hr @ 440º
8) 45 hr ↓ 400º
9) 46 hr ↓ 60º

A Sconce / Stamp Molding Sheet Glass


I originally wanted to create a mask, then a series of masks. Then when I showed the waxes to everyone they, and I, unanimously agreed that my textured pieces would make great light fixtures.

Due to unavoidable circumstances (the intense need to see Wreck-It-Ralph) I was an hour late to my school, where I needed to specifically insert the stamp at 680. I asked a fellow classmate to put the kiln on hold at 600 for me, but unfortunately the kiln accidentally cancelled it's program, and so when I came in the kiln was at about 350. I assume this is why the base mold had a large crack in it, and the stamp mold cracked in two when I tried to pick it up. This is my own fault, but the piece still turned out!

The glass I measured out was 8.75" wide by 13.75" long. It seemed I completely messed up the length (it was too long, and thus too thick near the bottom), but the width worked perfectly!

My second stamp mold test and first attempt to create a mask / sconce.


My next attempt for making a sconce via stamp molding was less successful, and can be seen here.

November 17, 2012
Kiln 5

1) 10 hr ↑ 120º
2) 24 hr ↑ 600º
3) 26 hr @ 600º
4) 26:01 ↑ 680º
5) 26:16 @ 680º
6) 26:17 ↑ 850º
7) 26:22 @ 850º (I skipped after a few minutes)
8) 26:23 ↓ 516º
9) 36 hr @ 516º
10) 40 hr ↓ 390º
11) 41 hr ↓ 50º

A Test On Program Time


The one special thing about this particular kiln program is that I changed the last three steps of the program to make them very short.


I took only one hour to go from 390 to 50 because the kiln takes over ten hours to come down, even when it's turned right off. Therefore, having a long cycle just makes the process unnecessarily longer.


I think it was a successful test, and since then I've been ending my programs much quicker than before.


Three tea lights, bear, fox, man (remelt for feet)

November 6, 2012
Kiln 3 (or 2?)

1) 03 hr ↑ 120º  * One mold made the day prior, + 4 hr for vent timing, + 1 hr @600 for pots
2) 07 hr @ 120º  *
3) 17 hr ↑ 600º  *
4) 19 hr @ 600º  *
5) 19:01 ↑ 850º
6) 24 hr @ 850º <- 5 hrs because of pots/reservoirs
7) 24:01 ↓ 516º
8) 27 hr @ 516º  ~ Time is so short as a test because kiln comes down so slowly anyway
9) 29 hr ↓ 390º  ~
10) 30 hr ↓ 50º  ~

First Stamp Test!

I was extremely excited for this test and it went absolutely wonderfully. The concept was brought on by a difficult wax that a fellow student made. It was a very shallow bowl that had texture on both sides, which means there is no easy area for the glass to melt in. Because of this he had to add on a very inventive reservoir and do a lot of cold working after the fact.

When I was trying to devise an easy way to cast his piece, one of the things I thought of was a two part mold that you put together in the kiln when it's at temperature - like a stamp.

This test piece was sculpted haphazardly but turned out quite nice. There was some odd wrinkling around the edges, and there was some ill texture in the indents that were created by the stamp mold. I assume this is because there was too much glass, so it began eating away at the lowermost part of the plaster stamp.

November 6, 2012
Kiln A1
1) 06 hr ↑ 120º  * wet mold
2) 08 hr @ 120º  *
3) 18 hr ↑ 600º  *
4) 19 hr @ 600º
5) 19:01 ↑ 850º (melt, stamp, re-melt)
6) 26 hr @ 850º
7) 26:01 ↓ 516º
8) 33 hr @ 516º
9) 38 hr ↓ 390º  ~ test for slow kiln
10) 40 hr ↓ 50º  ~


Above is the part of the glass that was hit by the mold. Below is what might be the traditional 'bottom'. Technically though, due to how amazing stamp molds are, either side could be up (and personally I like the bottom view better).


Glass Swatches

These pieces are just paper weights / tea light holders that I made over the summer as part of my 31 Days of Waxes. I think I did these pieces as a way to work through different textures and find ones that I liked. So that's why this blog post is called Glass Swatches, because as far as I'm concerned tea light holders are my equivalent of tab sketches or mini canvases.


7 tea light / paperweight objects

I skipped this program forward at "16:31" because it was actually approximately 2:30 into the melt. When the kiln drops to 849º instead of 850º, the glass is still melting, but the kiln has stopped counting the time. So you have to watch out for issues like that!

October 28, 2012
Kiln 2
1) 03 hr ↑ 120º  *
2) 07 hr @ 120º  *  Steamed out Saturday
3) 15 hr ↑ 600º  *
4) 16 hr @ 600º
5) 16:01 ↑ 850º
6) 21 hr @ 850º
7) 21:01 ↓ 516º
8) 24 hr @ 516º
9) 29 hr ↓ 390º
10) 32 hr ↓ 50º

A Combination Kiln

This kiln used entirely clear cullet. The pieces did not turn out due to what we can only assume was devitrification on the exposed surface of all of the pieces. Since we melted them twice (to add more cullet), some devit got caught in the middle of the pieces, which I find is very distasteful.


Dragon head, bowl machete, pepper core, pepper skin

October 23, 2012
Kiln 1

1) 10 hr ↑ 120º * wet molds! + vent adjustment
2) 30 hr @ 120º  *
3) 40 hr ↑ 600º  *
4) 42 hr @ 600º
5) 42:01 ↑ 850º
6) 52 hr @ 850º
7) 52:01 ↓ 516º
8) 62 hr @ 516º
9) 80 hr ↓ 390º
10) 90 hr ↓ 50º

Fruit Shot Glasses

The title is a bit misleading, I didn't actually create shot glasses, what I did was create small objects that had the negative space of a blackberry or strawberry inside the middle. It was a little bit fun, and very frustrating to try and clean the berry out.
Step One involved dipping the fruit into the hot wax and setting up some way to keep the fruit from sinking. As you can see, I chose to skewer it.
Looking for silicone baking molds? Try the second hand store.

Step Two was to cut out a rough shape and clean out the berry guts. I very much regretted cutting out only a rough shape instead of a finished one, as the coldworking was annoying. In the future I would make a master mold for berry cups.


Step Three was casting the plaster silica mold and then steaming out the wax. This is what the final mold looked like, and I think it is super neat. In fact, I really like the piece just like that.


I did eventually cast the berry in glass though.

September, 24, 2012

Kiln 5 (soft glass, pillows)

1) 04 hrs  ↑ 80º

2) 12 hrs  ↑ 120º
3) 15 hrs @ 120º
4) 20 hrs 600º
5) 22 hrs @ 600º
6) 22:01  ↑ 850º
7) 29 hrs @ 850º
8) 29:01 ↓ 516º
9) 38 hrs @ 516º
10) 54 hrs ↓390º
11) 70 hrs ↓ 50º

Crystal Cast (First Pepper)

This program actually confuses me a lot. Chemical water evaporates at 600, but for some reason I wrote down 500. As well, I used 850 as a melting temperature and that probably wasn't necessary.

The tree did not have enough glass and needs remelting.

Lime Green Crystal - Green pepper, tree, faerie, turtle


Hard to see faerie

Turtle


September 21, 2012
Kiln 2
1) 10 hr ↑ 90º
2) 24 hr ↑ 120º
3) 36 hr @ 120º
4) 40 hr ↑ 500º
5) 41 hr @ 500º
6) 41:01 hr ↑ 850º
7) 51 hr @ 850º
8) 51:01 ↓ 440º
9) 61 hr @ 440º
10) 71 hr ↓ 400º
11) 91 ↓ 50º

Wednesday, October 24, 2012

Glass X Penny Tests!

I wanted to put pennies into kilncastings, as copper is uniquely compatible with soft glass. We all know the copper content in pennies differs from year to year, so I ordered a bunch of pennies in chronological order and slumped a sheet of glass over top!

Pre-fusing


I left the last image in it's 'original size' to try and show how weird the pennies look. With all the glare they might look normal, but just look at the difference in size!


Oddly the pennies in the middle expanded and exploded the most, while the two most recent pennies look almost a-okay.


The conclusion? If you really want to use pennies, use the oldest ones you can possibly find, and expect strange things to happen. Otherwise, if the pennies are surface texture, just glue them in/on afterwards!


Also, do it while you can, because pennies are going away in Canada!

September 24, 2012
Mercedes

1) 1 min ↑ 750º
2) 1 hrs @ 750º
3) 1:01 ↓ 516º
4) 2 hrs @ 516º
5) 5 hrs ↓ 390º
6) 9 hrs ↓ 50º


Wednesday, October 17, 2012

Kiln Cast Penguin for Craft Battles!

On September 22nd I put this little guy in the kiln. He was a bit of a rush job, as time was running out to have him finished and photographed for the World Issues battle on the other blog that I co-host, Craft Battles.


His program was as follows:
Kiln 1 (soft glass, pillows)

1) 03 hr ↑ 120º
2) 10 hr @ 120º (He was freshly steamed)
3) 16 hr ↑ 600º
4) 17 hr @ 600º
5) 17:01 ↑ 850º
6) 22 hr @ 850º
7) 22:01 ↓ 516º
8) 25 hr @ 516º
9) 31 hr ↓ 390º
10) 35 hr ↓ 50º

Admittedly his annealing could be a wee bit short, I'm not sure. I was planning on enameling him in black, so I figured when I refired him he could have a safe annealing cycle. As the clock ran short and I realized I had no clue how to enamel still, I settled on brushing india ink on him instead

Check him out on Craft Battles when it's him versus a polar bear in a life jacket! ( End of Battle 04 )

Fritty Kilncastings

I just ran up my first kiln of the season, isn't it horrible that I waited over 10 days to do it? So sad.

In this kiln I had my apple core, my headless man (well, asexual thing), a bowl, a tiny version of one of my diptychs from last year, a concave block, two handable objects, an odd swirly object, and a little thing with holes in it.

Sept 15, 2012
Kiln 5
(soft glass, frit)
1) 13 hr ↑ 120º (This is part drying cycle, part overnight hold)
2) 20 hr @ 120º
3) 25 hr ↑ 600º
4) 27 hr @ 600º
5) 27:01 ↑ 850º
6) 37 hr @ 850º (Extra melt to combat frit)
7) 37:01 ↓ 516º
8) 42 hr @ 516º
9) 57 hr ↓ 390º
10) 72 hr ↓ 50º


Some pieces needed topping up so I sent the kiln back up on September 20th:

1) 12 hr ↑ 850º
2) 16 hr @ 850º
3) 16:01 ↓ 516º
4) 21 hr @ 516º
5) 36 hr ↓ 390º
6) 51 hr ↓ 50º


Unfortunately, in the end I was still sorely disappointed. I had made a large amount of clear frit for the beginning of the semester, and even with a total of 14 hours of melt, it still looked hideous.

Orion suggested that I could place the frit in a flower pot, so that it will be fully melted before it makes contact with my glass, however the ideal use of the frit (to me), was to make sure tiny areas would be filled in. So, it's back to pillows and making my own chunks of glass in the hot shop for me!

One handable object, that I had been particularly happy with as a wax, didn't turn out. I suppose I mistook what it was and didn't put enough glass in ):

Out of the kiln pieces
These need a ton of coldworking