Showing posts with label Experimental. Show all posts

Thursday, March 28, 2013

Recycle Glass By Fusing It Together

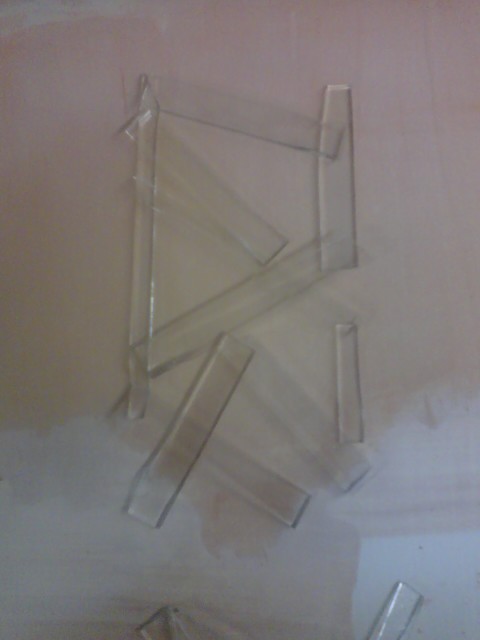
In an effort to be as sustainable as I possibly can be, and to have one of those dream Polyculture Studios one day, I decided that I absolutely could not throw out any scrap (except maybe tiny slivers that were going to slice my hand open).

I think I had known for a while that I was never going to condone throwing out scrap - I've been saving bits and bites all year after all. This was the first time an idea had actually taken off though. I knew that I didn't want to just throw scrap together and call it a pendant because that can look really awful sometimes, especially when it's tack fused. Don't get me wrong, it can look nice, but without proper rhyme or reason I would probably just create garbage.

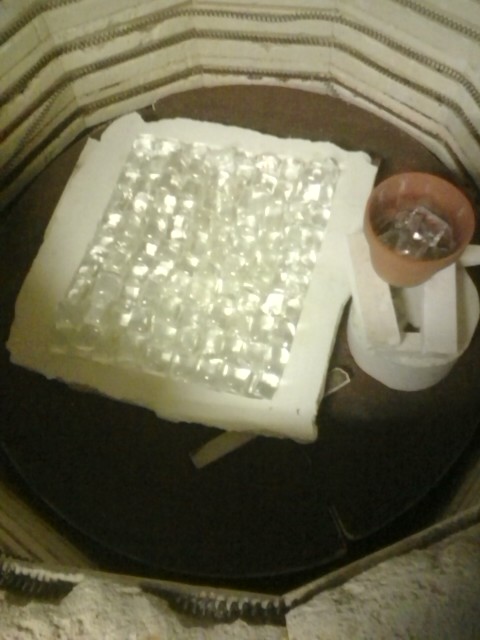
So I decided I'd do my best to stack different layers of color up, then I'd fuse it, cut pendants out of it and fuse it again. Ideally when I have lots of scraps I want to make a really thick stack, so that my pendants can be 1" or 1.5" long, all with different colored, mish-mashed lines!


I forgot to take a picture of the orange layer, but it's Green-Yellow-Orange-Green-Pink.

I don't have enough scrap right now to make a piece that's an inch of horizontal lines, so I'll have to suck it up and cut these babies up vertically! Should be fine.


My fused block of glass was actually this tiny amazing thing that I wanted to keep as-is and carry with me everywhere. I've never had just - a giant chunk of raw, solid color before, there was something really nice about it.


I really dig the way the bottom looks the most!


(Click to check out what the colour bar looks like on the inside when I start cutting it up.)


Wed March 27
Large Paragon
1) AFAP ↑ 793° for 20 min
2) AFAP ↓ 516° for 1 hour
3) 15 min ↓ 390°
4) AFAP ↓ 50°

*Note: I'm not worried about proper annealing since I'm fusing/annealing these again. I just don't want them to break while I'm cutting them!

Wednesday, February 27, 2013

Grapes

In an attempt to work with negative and positive spaces, especially in relation to nature (i.e. produce haha), I created this monstrosity.

The goal was to create a vessel/vase where the negative space would follow the outline of a bundle of grapes. Unfortunately, and oddly, it proved near impossible to get the grapes out. So in the future I'll have to take a silicone of one grape (because I want the forms to be as close to real as possible), and then I'll have to create my own wax grape vine.

Also, grapes did not like being dipped into wax, it made a weird frothy texture. It wasn't pretty.


Monday, February 25, 2013

Sandcasting Texture/Release Trials

To further my sand casting series I had a metal casting mold fabricated. This sped up the casting prep so much that it felt like a waste to throw mixed sand in the bottom of the metal mold (for texture), and then carry it all over to the acetylene torch and then back again. So on Saturday Stephanie and I experimented with different textures I could throw down that would have an easy release.

Since there are 26 photos you have to click "read more" for once, otherwise this post is really hard to scroll past!

These are the 8 results:

Cutting Sheet Glass Hearts - Test

Unfortunately I don't have a schedule for these little darlings. The importance of the test, for me, was the shape I cut. To save on space I just threw the pendants into a random kiln that Paul was running up for something else.


The piece that was cut to a template and then nipped turned out a lot better than the one that was cut into a triangle and then nipped. You can sort of tell in the image that the one on the right isn't as nice, but you never know how well a melt will clean up the lines.

The schedule for fusing hearts can be found in this earlier post though.

Fused Tree Bowl Test Cont. - Foliage

This second fusing was at a lower temperature, to add foliage around the edge of the shapes by using clear frit. The larger frit wasn't nearly as nice. You can see the first step here.


For the final step, the slumping, see here.

Wednesday Jan, 16
Large Paragon
1) 01 min ↑ 787°
2) 11 min @ 787°
3) 12 min ↓ 516°
4) 30 min @ 516°
5) 50 min ↓ 390°
6) 60 min ↓ 65°


Sunday, February 24, 2013

Fused Tree Bowl Test

Early on in my second year at Sheridan I found some really wonderful glass vessels on Etsy, and they amazed me because I didn't know how they were made. When you search online you can find a lot of what are named 'coral' vessels, which are glass strips that were fused in a pattern, then slumped over (or into) a bowl form, creating the look of, well, coral. Some people add another step to this process by adding foliage to the rim of the vessel, and it looks wonderful. 

It occurred to me one day that I had gained enough know-how to understand how those trickier vessels were made, so now it's time that I try to make one myself! Well, two actually. I'm sure the design won't be very pretty since they're my first attempts, but it's still exciting!

Here below are my two questionable patterns.


Tuesday, Jan 15, 2013
Mercedes
Fusing Test
1) 1 min ↑ 760°
2) 11 min @ 760°
3) 12 min ↓ 516°
4) 30 min @ 516°
5) 50 min ↓ 390°
6) 60 min ↓ 65°

*Annealing times are exceptionally short because this project has to be annealed two more times anyway.

To see the next step in this fusing process, where the pieces are fused and we add frit 'folliage' to the edges, click here.

Third Stamp Mold & Trial Flat Sconce


In December I fired a third stamp mold, and also tried fusing together a flat sconce in the same kiln (one) - because it would be easier if I could pick up the texture in a fuse and then slump it later, instead of doing a stamp mold.

The flat sconce didn't turn out at all, and without the pressure of the plaster mold (oddly), it did what fusings normally do at 850 and it blew a hole.

The stamped sconce didn't turn out, and it took me awhile to realize it was because I had put in one sheet of glass instead of two (so there was a gap of space between the glass and the two layers of plaster). Eventually I refired this with the usual schedule.


I make no promises that I will find this schedule, as I have an incredibly terrible habit of writing out schedules but not writing what I'm firing!

A successful sconce firing can be seen here.

Saturday, February 16, 2013

Nightlights

Taking after all the other fused glass artists out there, I decided to try my hand at making my own nightlights. I also thought they would be a fantastic way to test out my textured designs.

Steamed Out Molds


December 2, 2012 (I do think this date is wrong)
Kiln 4
1) 07 ↑ 120°
2) 08 @ 120°
3) 14 ↑ 600°
4) 15 @ 600°
5) 15:01 ↑ 900°
6) 17:30 @ 900°
7) 17:31 ↓ 516°
8) 24 @ 516°
9) 31 ↓ 390°
10) 32 ↓ 50°

Friday, December 21, 2012

Neat Things Happen at 600°!

I enthusiastically molded three large sheets of wax that I wanted to use as experiments for my whole new, lighting and texture direction. Unfortunately I was a little bit too enthusiastic and didn't think I needed a wall when hand building the molds, and so they of course took forever and turned out horrible. I tried casting one of the sheets, along with a clear, soft glass pepper, but the mold broke.

But wait! This is a good thing, because I got to see the weird step that occurs around 600 degrees, which is when chemical water leaves the mold.

Amazing texture!

A doomed mold that took a very, very long time to lay out.

The amazingly weird gray color that was all over my mold in patches.


Nov, 30, 2012
Kiln 4
1) 09 ↑ 120°
2) 10 @ 120°
3) 20 ↑ 600°
4) 21:30 @ 600°
5) 21:31 ↑ 900°
6) 26 @ 900°
7) 26:01 ↓ 516°
8) 33 @ 516°
9) 47 ↓ 390°
10) 48 ↓ 60°

Tuesday, December 4, 2012

A Sconce / Stamp Molding Sheet Glass


I originally wanted to create a mask, then a series of masks. Then when I showed the waxes to everyone they, and I, unanimously agreed that my textured pieces would make great light fixtures.

Due to unavoidable circumstances (the intense need to see Wreck-It-Ralph) I was an hour late to my school, where I needed to specifically insert the stamp at 680. I asked a fellow classmate to put the kiln on hold at 600 for me, but unfortunately the kiln accidentally cancelled it's program, and so when I came in the kiln was at about 350. I assume this is why the base mold had a large crack in it, and the stamp mold cracked in two when I tried to pick it up. This is my own fault, but the piece still turned out!

The glass I measured out was 8.75" wide by 13.75" long. It seemed I completely messed up the length (it was too long, and thus too thick near the bottom), but the width worked perfectly!

My second stamp mold test and first attempt to create a mask / sconce.


My next attempt for making a sconce via stamp molding was less successful, and can be seen here.

November 17, 2012
Kiln 5

1) 10 hr ↑ 120º
2) 24 hr ↑ 600º
3) 26 hr @ 600º
4) 26:01 ↑ 680º
5) 26:16 @ 680º
6) 26:17 ↑ 850º
7) 26:22 @ 850º (I skipped after a few minutes)
8) 26:23 ↓ 516º
9) 36 hr @ 516º
10) 40 hr ↓ 390º
11) 41 hr ↓ 50º

Adopting A Bottle Slumping Schedule For Flat Fuses

I decided I wanted to try and reclaim some of the recycled glass that was going to go into the casting furnace. I thought if I could flatten the glass I could reuse it somehow in bowls or other slumping projects.

These pieces came out rather wonky looking, and looked a lot more attractive with the white kiln paper stuck to the back then they did when it was washed off. They were flat, but my ability to judge how the glass would look match up when it was flat was really awful, meaning there were lots of gaps.


November 10, 2012
The Italian
1) AFAP ↑ 1100º F (595º C) - H for 10 Min
2) AFAP ↑ 1300º F (705º C) - H for 20 Min
3) AFAP ↑ 1475º F (802º C) - H for 05 Min
4) AFAP ↓   959º F (515º C) - H for 60 Min

However I had to adjust for the fact that the Italian over fires by about 60º C. I decided to go down just 50º C to be safe. So my final schedule was;

1) AFAP ↑ 1050º F - H for 10 Min
2) AFAP ↑ 1250º F - H for 20 Min
3) AFAP ↑ 1425º F - H for 05 Min
4) AFAP ↓  909º F  - H for 60 Min

A Test On Program Time


The one special thing about this particular kiln program is that I changed the last three steps of the program to make them very short.


I took only one hour to go from 390 to 50 because the kiln takes over ten hours to come down, even when it's turned right off. Therefore, having a long cycle just makes the process unnecessarily longer.


I think it was a successful test, and since then I've been ending my programs much quicker than before.


Three tea lights, bear, fox, man (remelt for feet)

November 6, 2012
Kiln 3 (or 2?)

1) 03 hr ↑ 120º  * One mold made the day prior, + 4 hr for vent timing, + 1 hr @600 for pots
2) 07 hr @ 120º  *
3) 17 hr ↑ 600º  *
4) 19 hr @ 600º  *
5) 19:01 ↑ 850º
6) 24 hr @ 850º <- 5 hrs because of pots/reservoirs
7) 24:01 ↓ 516º
8) 27 hr @ 516º  ~ Time is so short as a test because kiln comes down so slowly anyway
9) 29 hr ↓ 390º  ~
10) 30 hr ↓ 50º  ~

First Stamp Test!

I was extremely excited for this test and it went absolutely wonderfully. The concept was brought on by a difficult wax that a fellow student made. It was a very shallow bowl that had texture on both sides, which means there is no easy area for the glass to melt in. Because of this he had to add on a very inventive reservoir and do a lot of cold working after the fact.

When I was trying to devise an easy way to cast his piece, one of the things I thought of was a two part mold that you put together in the kiln when it's at temperature - like a stamp.

This test piece was sculpted haphazardly but turned out quite nice. There was some odd wrinkling around the edges, and there was some ill texture in the indents that were created by the stamp mold. I assume this is because there was too much glass, so it began eating away at the lowermost part of the plaster stamp.

November 6, 2012
Kiln A1
1) 06 hr ↑ 120º  * wet mold
2) 08 hr @ 120º  *
3) 18 hr ↑ 600º  *
4) 19 hr @ 600º
5) 19:01 ↑ 850º (melt, stamp, re-melt)
6) 26 hr @ 850º
7) 26:01 ↓ 516º
8) 33 hr @ 516º
9) 38 hr ↓ 390º  ~ test for slow kiln
10) 40 hr ↓ 50º  ~


Above is the part of the glass that was hit by the mold. Below is what might be the traditional 'bottom'. Technically though, due to how amazing stamp molds are, either side could be up (and personally I like the bottom view better).


Saturday, October 27, 2012

First Paper Marbling Attempt


Pan of water with acrylic and gouache paints dripped onto the surface via eye droppers and paint brushes.

-> Acrylic paint only worked for two attempts.
-> Eye droppers worked horribly, made tons of bubbles.
-> Tried to thin out paints with a bit of water - a proper thinner or 'liquid paints' would be better
-> Tried marbling with a little bit of soap, as well as a lot, but it didn't work, despite claims that all you need is 'a drop'. Most likely didn't work because of the paints.


October 26, 2012

Friday, September 7, 2012

Texture Research

Different ways to create texture!


Horse Hair Pottery
Rob Drexel, n/a (ceramic, cactus, leather, horse hair)

Residue from horse hair being applied to a hot vase
Horse hair working wonderfully to bring attention to the gradient

Horse hair layered on the inside and out of a bowl
 Horse hair pottery designs occur when horse hair is applied to heated wares, at which point it burns and leaves nothing but the smoke patterns and carbon trails behind. I love the sporadic and uncontrollable nature of the black designs that the horse hair leaves – I’m quite a fan of elements that you aren’t in control of. While I do not believe that such wondrous trails will last on the surface of fused glass - unless perhaps caught in between two layers - I did conceive of a way to sort of mimic this affect when I was trying to figure out how it was done. Namely, dip your hair in enamels and then drop it on or run it across your work. It won't be so spontaneously squiggly as the original, but it will help you apply fine, slightly sporadic designs!

Rock Molds
Rock Molds, 2012 (concrete, stamp)

The best close up I could find
Rock Molds appears to be a company which sells a variation of press-on plastic molds that you apply to concrete in order to create fake flagstones. I would wager money that their molds are taken from real stones, and I like the idea that with the texture of a few stones they can recreate an endless amount of stones! You can choose your shape, your color, your mixture of textures, it's just wonderful. The realistic nature of these large stones does, however, depend on how much thought the artist puts into the placement of the different stamps (some look rather gaudy to me). This will be great for creating landscapes in the future, as well as for my friend that was just recently questioning whether to incorporate real rocks into a piece or to create her own, and finally, this concept will satisfy my mother, who is always bothering me for glass rocks and glass beach stones. Of course, I'd want to devise a way that a rock textured piece would be cost-effective, especially if I was only slumping stones for my mother. I do think that applying a heavy rock texture to a bowl (a clear one and an opaque one) would turn out just wonderfully. Perhaps a patte-de-verre?

Buddyfly, August 8, 2004 (rhubarb leaf, cement, silicone
Silicone rhubarb leaf
Flat cement rhubarb leaf stones

Shapely cement rhubarb leaf birdbath
 In one process it appears large rhubarb leaves are pressed lightly into cement to create flat and even stepping stones. In another process they pressed the leaf into a POP mold (cannot figure out what that means), and then created a silicone mold from that. Due to the fact that the POP mold is the positive of the final image, and the silicone is the appropriate negative, I can’t understand how the artist would use the POP to create a flat stepping stone. It appears that with the silicone mold he was able to create shapely cement stones that are useable as birdbaths and stand alone decorations. The slightly indented cement casts, coupled with the ruffled texture that lines them, makes the rhubarb leaves look like they were meant to be made into birdbaths and art. I think this idea works very well in the garden, it’s great that it’s weatherproof, and I love how easy it is to accomplish. I suppose that means that if I pushed a large rhubarb leaf into plaster and slumped glass over it I would create a shapely glass plate, candy dish or decoration. Orange, red and yellow leaves of all sizes would be wonderful for Autumn / Halloween production pieces! Green would be great for spring, possibly Easter?


Leaf Stamps
Carol R. Eaton, July 11, 2011 (fabric, fabric paint/silk screen ink, leaves)
Print from leaf coated in green ink
Leaves are painted in fabric friendly paint or ink and then pressed onto fabric. This would be perfectly applicable with enamels! It would provide such an easy way to quickly create similar but customized designs on slumped plates and bowls! It could also be used to bring new life and design to plain gaffers cups.
Leaf Imprint Mosaics
Marylou Newdigate, June 29, 2012 (ceramics, leaves)
Freshly cut and peeled clay leaves

Ceramic leaves set into a table
Leaves are pressed into clay, then cut out in their respective shapes, to be used in future mosaics and as inclusions in tables. I think with thin sheets of wax or clay this is a process that could directly apply to the process of making leaves or flowers to apply to molds as decorations. The only way the actual mosaic process would be helpful to me (see Craig’s Table for my reference of thought), is if I perhaps casted the leaves on their own – in different color. I could then fuse the leaves together, even with clear glass filling the crevices in between them; if color did not matter I could press wax leaves, arrange them into a plate design, then pour wax to fill up all the negative space between the leaves.

Leaf Imprint Stepping Stones
Stevie, June 9, 2012 (concrete, leaves and pebble stones)
Leaves are weighed down into cement with pebbles to create imprinted stepping stones. The act of weighting items to get better texture and depth will probably be useful. As well, pushing a material straight into plaster would be a simple and effective time saver, and much easier than pushing an item into wax or clay.
Leaf Imprinted Ceramics
pink_pamplemousse, June 14, 2009 (ceramic and leaves)

Ceramic vase with leaves painted differently than background
Leaves were pushed straight into the clay. I like this piece because it brought to my attention the idea of isolating texture in a different color to help it stand out, or in the reverse I could reuse the texture in a tight pattern and perhaps if I didn’t put emphasis on the texture it would no longer be recognizable as, say, a leaf pattern.
Kiwi Mold
Van Yulay, July 07, 2012, (kiwis, silicone)

A silicone mold created out of kiwi halves. I find it particularly amusing that the creator has decreed that no other is allowed to pour silicone over a kiwi. Making multipiece molds would be helpful if I discovered a texture I really enjoyed. In fact, this would be ideal for creating detailed fruit coasters that are cuts of kiwi, orange, lemon and lime. My idea was simply to paint on the design, but having added texture would really make them unique, and fulfill my joy of texturing objects. Only, as these molds would be for slumping glass and not pouring wax, I would want to create plaster molds that hopefully refrain from undercuts; otherwise I shall create a large multipiece silicone mold for each fruit, so that I can pour a new plaster every time.

Leaf Imprints With Crayon and Watercolor
Carolyn, June 29, 2011 (paper, crayon, watercolor, leaves
)
 Paper is placed over leaves and the texture is picked up with crayons and then watercolor. There isn’t anything I specifically like about these pieces or pictures, perhaps because they’re simple crafts for kids. I decided not to count out any relative ideas I came across though, because you never know when the concept might become relative in a new way. For all I know I could run over a piece of translucent paper with enamels, then press a sheet of glass against that and pick up the enamels – though it would be far easier to just paint on the leaf itself and cut out the middle man. Still, if I drop this link I will regret it, so that's why this little diddy is in here.

Magic Foam Stamp
Textured magic foam!
As an added bonus I stumbled upon this little beauty! Magic Foam Stamps appear to be a product of foam that you heat with a hair dryer and then press onto any textured surface you’d like. If you do not like the texture, or are finished with it, you simply apply the hair dryer again to return the foam to it’s regular state. This may not work ideally with wax (perhaps frozen though?), as wax will melt when heated up. It is useful for clay as well as picking up natural textures though. As an added bonus you are picking the texture up on a flat surface, which makes for easy reapplication!

Other ideas I am interested in researching and exploring are:
Different ways to make molds
Enameling & screen printing
Recycling fired plaster
Unconscious artMarbling glass
InclusionsDecals